We really must be in the home stretch!
We found out that this week our concrete walkway from the garage to our front door will be laid (was delayed due to rain) and the asphalt for the shared driveway should be poured any day now!
But NEXT WEEK... our hardwood floors and carpet are going in!! WOOHOO!!! My guess is the granite is coming also. When I peeked in yesterday there was a piece of paper saying the granite inspection was done on the cabinets. I guess they want to make sure the granite won't crush it!
It's gettin' real! So exciting! Hopefully we will have some pictures this week or next week of some serious progress!
Happy building!
Thursday, February 28, 2013
Saturday, February 23, 2013
Inside Progress Pictures!
Went over to the house and to our surprise, workers were there putting in our tile plus other goodies were installed!! We are rollin'!!
 |
| Front of house |
 |
| Kitchen cabinets (Tahoe Cherry Bordeaux) |
 |
| Tile in the laundry/mudroom |
 |
| Master Bathroom |
 |
| Mantle installed! |
 |
| Railings in! (to be stained later) |
 |
| Kids' bathroom |
 |
| Kids's bathroom |
Friday, February 22, 2013
Cabinets and many more goodies going in!
Stopped by the house yesterday to see we had doors, kitchen and bathroom cabinets, and our railings were waiting to be installed! WOW! I didn't get too many great pics because it was chaotic and loud in there. We are planning to visit tomorrow so I will get more/ better pics! Plus I am guessing so much will be complete by then!


Tahoe cherry Bordeaux going in!!

Guest bathroom: Maple Espresso
Monday, February 18, 2013

Locked and Loaded
We locked our rate today at 3.75%. Not the best rate in the recent past, but historically it's excellent. Just goes to show where rates are going now-a-days. We accepted it, in part, because of the very real risk that FHA rates are going to be going up soon. We had initially gotten our quote at 3.5% which a bunch more in lender credit, but it is what it is. That's one less thing we have to worry about and one step closer to closing.
I am a little upset, though because it was supposed to be communicated to our lender two weeks ago after our pre-dry wall meeting that we should start looking at rate quotes and that message was missed. Rates were a tad lower then.
Oh well. Can't be bitter. Have to enjoy the process for what it is and be excited for our new home!
Saturday, February 16, 2013


Friday, February 15, 2013
It's So Tough to Stay Away...
I had to go back and see the house (and yes, it is now a house!) for myself. I am so glad I did! It looks beautiful. I am so happy with the way the brick turned out (Berkshire), I LOVE it! I love the way the siding (pebble clay) compliments the brick. Here are some pics I took while there. Yes, I will be going back today :-)
Some of these are panoramic view so they look like odd angles, but you get the point!


Some of these are panoramic view so they look like odd angles, but you get the point!

Backyard looking toward the back of the house

Kids' bedroom #1

Master Bedroom

Kids' bedroom #2

Master Bathroom

Front of the house

Garage

Pebble clay siding
 Standing in the kitchen of the family room and morning room (this panoramic makes it look huge and kind of weird!)
 Side yard
 LOVE the return wall!


Wednesday, February 13, 2013
OMG! It's A House!
Went to see how the brick was coming along and oh my goodness, the house looks like a house. Brick is almost complete, they started putting on the siding, the dry wall is all hung and almost complete. You can actually see the rooms! I also peeked inside the walls of the laundry room and it looks like they kept my insulation in there. I don't know if they kept the insulation on the pipe, but I will be sure to peek after the house is complete. Enjoy the pics!
 |
| OMG! It's our house! |
 |
| Looking down from the upstairs. Look at that light! |
 |
| The backing of our shower |
 |
| Our foyer stairway |
 |
| Looking down from our son's room to the foyer |
 |
| Our master bath |
 |
| Our shower |
 |
| Our family room and fireplace |
 |
| Foyer |
 |
| Morning room |
 |
| Morning room |
 |
| Our siding is going up! |
 |
| Kitchen |
 |
| Hallway off the garage and powder room |
 |
| The front of our house...obviously |
Tuesday, February 12, 2013
.JPG)
It's a Brick....Hooouuse!
They finally started bricking yesterday. Perfect day for it too, 58 and sunny. They may finish the entire front off today. It's 50 and sunny today. It's like it was meant to be.
I also peaked in the inside last night and the drywall was all prepared and ready to go today. The workers hadn't removed my pipe insulation yet, so hopefully they will be able to work around that. Who knows. I did note that no one installed the remaining Roxul. I guess that was too much to hope for.
.jpg)
.jpg)
Sunday, February 10, 2013
Creating our own joy, one doorway at a time.
Today we decided that, before the drywall goes up this week, we would put some prayers/ blessings in certain doorways. We feel very fortunate and grateful to be given the opportunity to build a home for our family and want to keep it secure and full of joy! It is great to be able to put a little bit of us into it before it is complete.
Here are the pictures with the blessings (they are hard to see so I wrote what they are underneath).


Here are the pictures with the blessings (they are hard to see so I wrote what they are underneath).

This blessing is on the front door and the doorway leading from the garage to the house:
"Let no sadness come through this gate. Let no trouble come into this dwelling. Let no fear come through this door. Let no conflict be in this place. Let this home be filled with the blessing of joy and peace."

This blessing is on the doorway to the Master bedroom and Guest bedroom:
"May this home be a place of happiness and health, of contentment, generosity and hope, a home of creativity and kindness. May those who visit and those who live here know only blessing and peace."

This blessing is on the two boys' doorways:
"May God bless you and guard you. May God show you favor and be gracious to you. May God show you kindness and grant you peace."
Continued Happy Building. Everyone!
Saturday, February 9, 2013
Plumbing Insulation Update
So after calling all of the Lowes and 84 Lumbers in the area with no positive results, it occurred to me that I didn't check Home Depot for some reason. I guess I figured that if Lowes didn't have it, they wouldn't either. Sure enough, I called my local Home Depot and they had a whole bunch of Roxul Safe n' Sound. I put three on hold (each package is about $40 and fills a 59 sq foot area). I ran over there and put it in my car before they changed their minds.
I headed over to the home site with all of my products and a general plan in mind. One problem...upon a closer inspection all of the pipes are about flush with the studs. Now what? I have three different kinds of insulation and no room to fit any of it behind the drywall. Well, I first addressed the laundry room/family room wall. I placed the Roxul in all of the easy places first. The stuff is very easy to install. Just make some cuts out of it like bread to fit around receptacles and wires and you pop it in.
Then I had to face my issue of the pipes that are already flush with the wall. I decided to wrap the main pipe running down the family room wall with the pipe insulation. I used duct tape to seal all of the joints and secure it to the pipe. I filled any gaps with spray foam insulation. I have no idea if the drywallers are simply going to remove the work I did in the areas that pop out or if they will try to accomodate it. I really hope it stays because that pipe is my real worry. I ended up using about a bag and a half of the Roxul.
I didn't even attempt to address the pipes in the ceiling. The same issue existed with those pipes, but unlike the wall pipes, I wasn't able to manipulate the insulation as well because it was all the way up in the ceiling. Hopefully we don't notice it much up there. You would think it would be the big vertical drop that causes much of the noise. I've included a picture of the project below. The insulation that's green is my work. I have no idea if it all is going to make any difference and I'll never know since we won't know anything else. Hopefully we're happy with it all. (I left the Roxul at the site and am going to send a note to the PM stating that if the insulators want, they can feel free to use the rest of it over the ceiling pipes. We'll see)

Friday, February 8, 2013
Time to DIY: Plumbing Insulation
*** UPDATE****
So after calling all of the Lowes and 84 Lumbers in the area with no positive results, it occurred to me that I didn't check Home Depot for some reason. I guess I figured that if Lowes didn't have it, they wouldn't either. Sure enough, I called my local Home Depot and they had a whole bunch of Roxul Safe n' Sound. I put three on hold (each package is about $40 and fills a 59 sq foot area). I ran over there and put it in my car before they changed their minds.
I headed over to the home site with all of my products and a general plan in mind. One problem...upon a closer inspection all of the pipes are about flush with the studs. Now what? I have three different kinds of insulation and no room to fit any of it behind the drywall. Well, I first addressed the laundry room/family room wall. I placed the Roxul in all of the easy places first. The stuff is very easy to install. Just make some cuts out of it like bread to fit around receptacles and wires and you pop it in.
Then I had to face my issue of the pipes that are already flush with the wall. I decided to wrap the main pipe running down the family room wall with the pipe insulation. I used duct tape to seal all of the joints and secure it to the pipe. I filled any gaps with spray foam insulation. I have no idea if the drywallers are simply going to remove the work I did in the areas that pop out or if they will try to accomodate it. I really hope it stays because that pipe is my real worry. I ended up using about a bag and a half of the Roxul.
I didn't even attempt to address the pipes in the ceiling. The same issue existed with those pipes, but unlike the wall pipes, I wasn't able to manipulate the insulation as well because it was all the way up in the ceiling. Hopefully we don't notice it much up there. You would think it would be the big vertical drop that causes much of the noise. I've included a picture of the project below. The insulation that's green is my work. I have no idea if it all is going to make any difference and I'll never know since we won't know anything else. Hopefully we're happy with it all. (I left the Roxul at the site and am going to send a note to the PM stating that if the insulators want, they can feel free to use the rest of it over the ceiling pipes. We'll see)

Inspired by Road to the Ravenna, I have decided to dive into the DIY world myself. Before our drywall goes up this coming Tuesday, I wanted to do a little soundproofing on the plumbing coming down from the toilets and showers on the second floor through the family room and kitchen (I've already mentioned this in previous posts).
What I really wanted to do was buy a product called Roxul, which is an accoustic, sound dampening insulation. But when I went to purchase it tonight, it seems that no one carries it. You have to special order it. I don't have time for that. Bummer! (*I did just find that the local 84lumber is a Roxul dealer and will call them tomorrow morning to see if they have it in stock. Cross your fingers!). If you have enough time to order this stuff, from what I understand, this is the way you want to go.
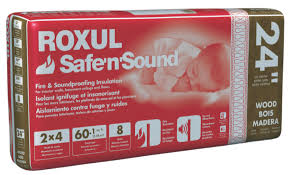
Check out their site here: http://www.roxul.com/home
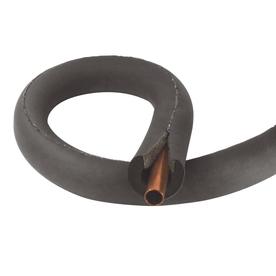
Alternate Strategy: Assuming I'm unable to locate some Roxul before installation tomorrow, I am prepared to go with plan B. Tonight I went to Lowes and bought some 3/4" piping insulation. The stuff is pretty dense, although I've heard it nevertheless is not the best thing for sound proofing. It will dampen the noise though. I also purchased a couple egg crate foam mattress pads from walmart. These are made from open cell polyurethane, which is superior to the closed cell stuff for sound dampening purposes. To complete my shopping, I purchased a couple rolls of duct tape, large zip ties and insulating foam.
Depending on how much space I have between the pipe and the wall, the plan is to first insulate the pipes with the pipe insulation. If I have room, I will then cover that with the egg crate foam, secured with duct tape and zip ties. Any gap or seal will then be sealed with the spray insulating foam.
It's not ideal, it's not plan A, but I think it certainly should help. If I can, I'll pick up some Roxul and line the wall between the laundry room and family room with that, in addition to the areas where they piping will be coming down and just return all of the other stuff. Stay tuned!

You can find it here: http://www.walmart.com/ip/Mainstays-1.25-Convoluted-Foam-Topper-Multiple-Sizes/10055840
I've also read that thick carpet padding is ideal for soundproofing pipes. We just recarpeted and I could have had more than enough. Shoot!
So after calling all of the Lowes and 84 Lumbers in the area with no positive results, it occurred to me that I didn't check Home Depot for some reason. I guess I figured that if Lowes didn't have it, they wouldn't either. Sure enough, I called my local Home Depot and they had a whole bunch of Roxul Safe n' Sound. I put three on hold (each package is about $40 and fills a 59 sq foot area). I ran over there and put it in my car before they changed their minds.
I headed over to the home site with all of my products and a general plan in mind. One problem...upon a closer inspection all of the pipes are about flush with the studs. Now what? I have three different kinds of insulation and no room to fit any of it behind the drywall. Well, I first addressed the laundry room/family room wall. I placed the Roxul in all of the easy places first. The stuff is very easy to install. Just make some cuts out of it like bread to fit around receptacles and wires and you pop it in.
Then I had to face my issue of the pipes that are already flush with the wall. I decided to wrap the main pipe running down the family room wall with the pipe insulation. I used duct tape to seal all of the joints and secure it to the pipe. I filled any gaps with spray foam insulation. I have no idea if the drywallers are simply going to remove the work I did in the areas that pop out or if they will try to accomodate it. I really hope it stays because that pipe is my real worry. I ended up using about a bag and a half of the Roxul.
I didn't even attempt to address the pipes in the ceiling. The same issue existed with those pipes, but unlike the wall pipes, I wasn't able to manipulate the insulation as well because it was all the way up in the ceiling. Hopefully we don't notice it much up there. You would think it would be the big vertical drop that causes much of the noise. I've included a picture of the project below. The insulation that's green is my work. I have no idea if it all is going to make any difference and I'll never know since we won't know anything else. Hopefully we're happy with it all. (I left the Roxul at the site and am going to send a note to the PM stating that if the insulators want, they can feel free to use the rest of it over the ceiling pipes. We'll see)

Inspired by Road to the Ravenna, I have decided to dive into the DIY world myself. Before our drywall goes up this coming Tuesday, I wanted to do a little soundproofing on the plumbing coming down from the toilets and showers on the second floor through the family room and kitchen (I've already mentioned this in previous posts).
What I really wanted to do was buy a product called Roxul, which is an accoustic, sound dampening insulation. But when I went to purchase it tonight, it seems that no one carries it. You have to special order it. I don't have time for that. Bummer! (*I did just find that the local 84lumber is a Roxul dealer and will call them tomorrow morning to see if they have it in stock. Cross your fingers!). If you have enough time to order this stuff, from what I understand, this is the way you want to go.
Check out their site here: http://www.roxul.com/home
Alternate Strategy: Assuming I'm unable to locate some Roxul before installation tomorrow, I am prepared to go with plan B. Tonight I went to Lowes and bought some 3/4" piping insulation. The stuff is pretty dense, although I've heard it nevertheless is not the best thing for sound proofing. It will dampen the noise though. I also purchased a couple egg crate foam mattress pads from walmart. These are made from open cell polyurethane, which is superior to the closed cell stuff for sound dampening purposes. To complete my shopping, I purchased a couple rolls of duct tape, large zip ties and insulating foam.
Depending on how much space I have between the pipe and the wall, the plan is to first insulate the pipes with the pipe insulation. If I have room, I will then cover that with the egg crate foam, secured with duct tape and zip ties. Any gap or seal will then be sealed with the spray insulating foam.
It's not ideal, it's not plan A, but I think it certainly should help. If I can, I'll pick up some Roxul and line the wall between the laundry room and family room with that, in addition to the areas where they piping will be coming down and just return all of the other stuff. Stay tuned!

You can find it here: http://www.walmart.com/ip/Mainstays-1.25-Convoluted-Foam-Topper-Multiple-Sizes/10055840
I've also read that thick carpet padding is ideal for soundproofing pipes. We just recarpeted and I could have had more than enough. Shoot!
Subscribe to:
Posts (Atom)